Tag: warhammer

  • A Mindful Approach to Comparison in Warhammer

    A Mindful Approach to Comparison in Warhammer

    Here at Badgeroid my mission is to apply Mindfulness to the Warhammer painting hobby. Using Warhammer as a tool to support mental health and provide stress relief, as well as finding a way to hobby mindfully.

    Warhammer is a creative and immersive hobby. You play games, paint miniatures, and read books. There are also animations now! The creative freedom that it allows is one of the most compelling aspects for me.

    However, despite this, I had a crisis of confidence on my Warhammer journey as of late.

    After some soul searching, I realised that I’ve been comparing myself to others. To the point where sometimes it affects my mood, my motivation to paint and ultimately my mental health.

    This has highlighted the importance of balancing supporting and learning from the wider community with managing my expectations and celebrating my achievements.

    The Pitfalls of Comparison in Warhammer

    A collection of painted Warhammer miniatures and other brands

    So, obviously I love the eye candy of the awesome miniatures painted by some incredibly talented people. It inspires me to try new techniques or paint in different ways. But other times I get the opposite feeling. It’s a feeling of not being good enough. Maybe even envious of other painters.

    The reasons are many:

    • They are better painters than me. 
    • They paint faster than me.
    • They are more consistent at the hobby than me.
    • Better conversions and kitbashes.
    • They build cool terrain.
    • They seem to have more time to dedicate to the hobby than me.

    And all this is especially true when I open Instagram. The innate human nature of wanting to compare ourselves against others created the perfect storm when combined with social media.

    The Negative Effects of Constant Comparison

    It is near impossible not to compare myself to what I can see online. Even though I know I shouldn’t. It sometimes gets under my skin so much that it saps away my enjoyment of Warhammer and the hobby, and can build anxiety and stress.

    This is often due to unrealistic expectations that social media can create. For instance, watching a video about “HoW tO pAiNt An ArMy in 24h!1!!” makes me want to do the same thing even though I know I won’t be able to. It’s real life down here, and real life is not a YouTube video.

    To give you a concrete example: I was almost quit the hobby and didn’t paint a single miniature for 3 months because a post on Instagram didn’t get many likes. I was jealous of others that had big followings and felt like if I had no likes, there’s no point!

    Mindfulness as a Solution

    A game of Bloodbowl Sevens in progress

    Mindfulness is where you focus on staying in the present, whilst accepting and acknowledging your feelings, thoughts and emotions.

    I have been practicing mindfulness for over 2 years now to manage these (and other!) feelings; enabling myself to enjoy the hobby again, not for Likes, but for my liking and benefit.

    On this journey, I found the following techniques most useful to combat the pressures of social media and comparison: 

    • Enjoy the process. Not the outcome.
    • Celebrate your progress and the small wins.
    • Practice mindfulness while painting.
    • Limit Social Media!

    Enjoy the process

    Try to focus on the present moment. Savour the enjoyment you get from simply painting Warhammer, rather than focusing on the outcome. This brings back the intrinsic satisfaction of the act of painting Warhammer miniatures. And in turn, when the enjoyment returns to the process, not the outcome, it helps to remove the need for external validation.

    Celebrate Your Progress

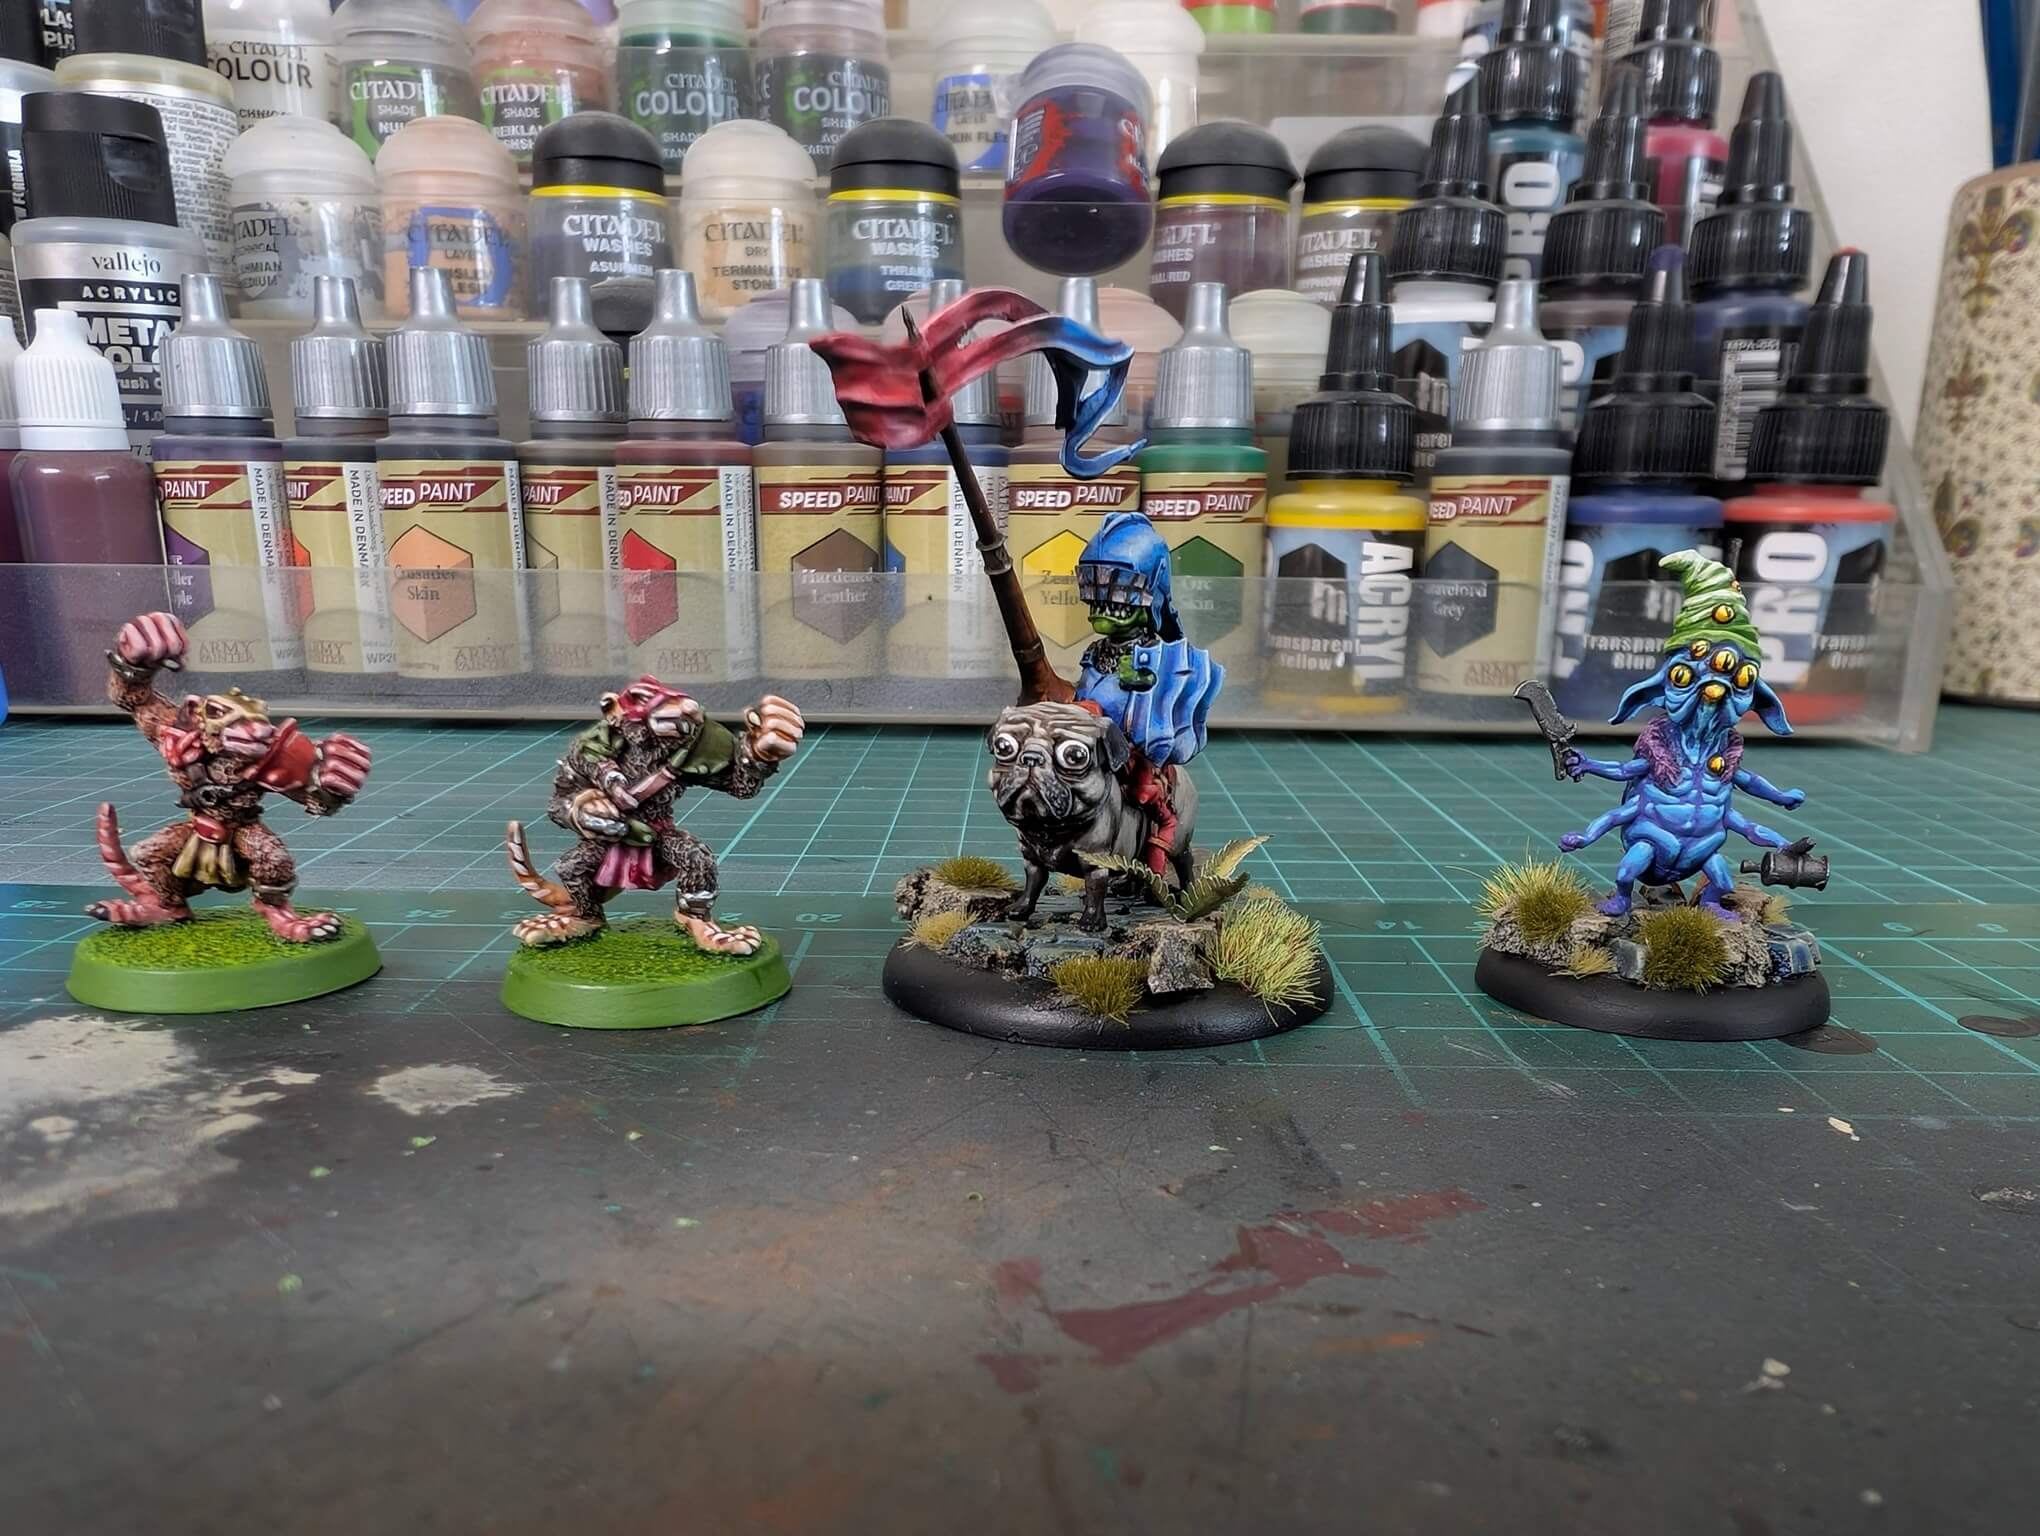
    By focusing on the present, you can celebrate your progress rather than comparing with others. I celebrate when I finish one unit for my army, or a grunt – or even when a new technique (kind of) works! I love the feeling of completing a step and a miniature, and these small wins give me motivation to carry on.

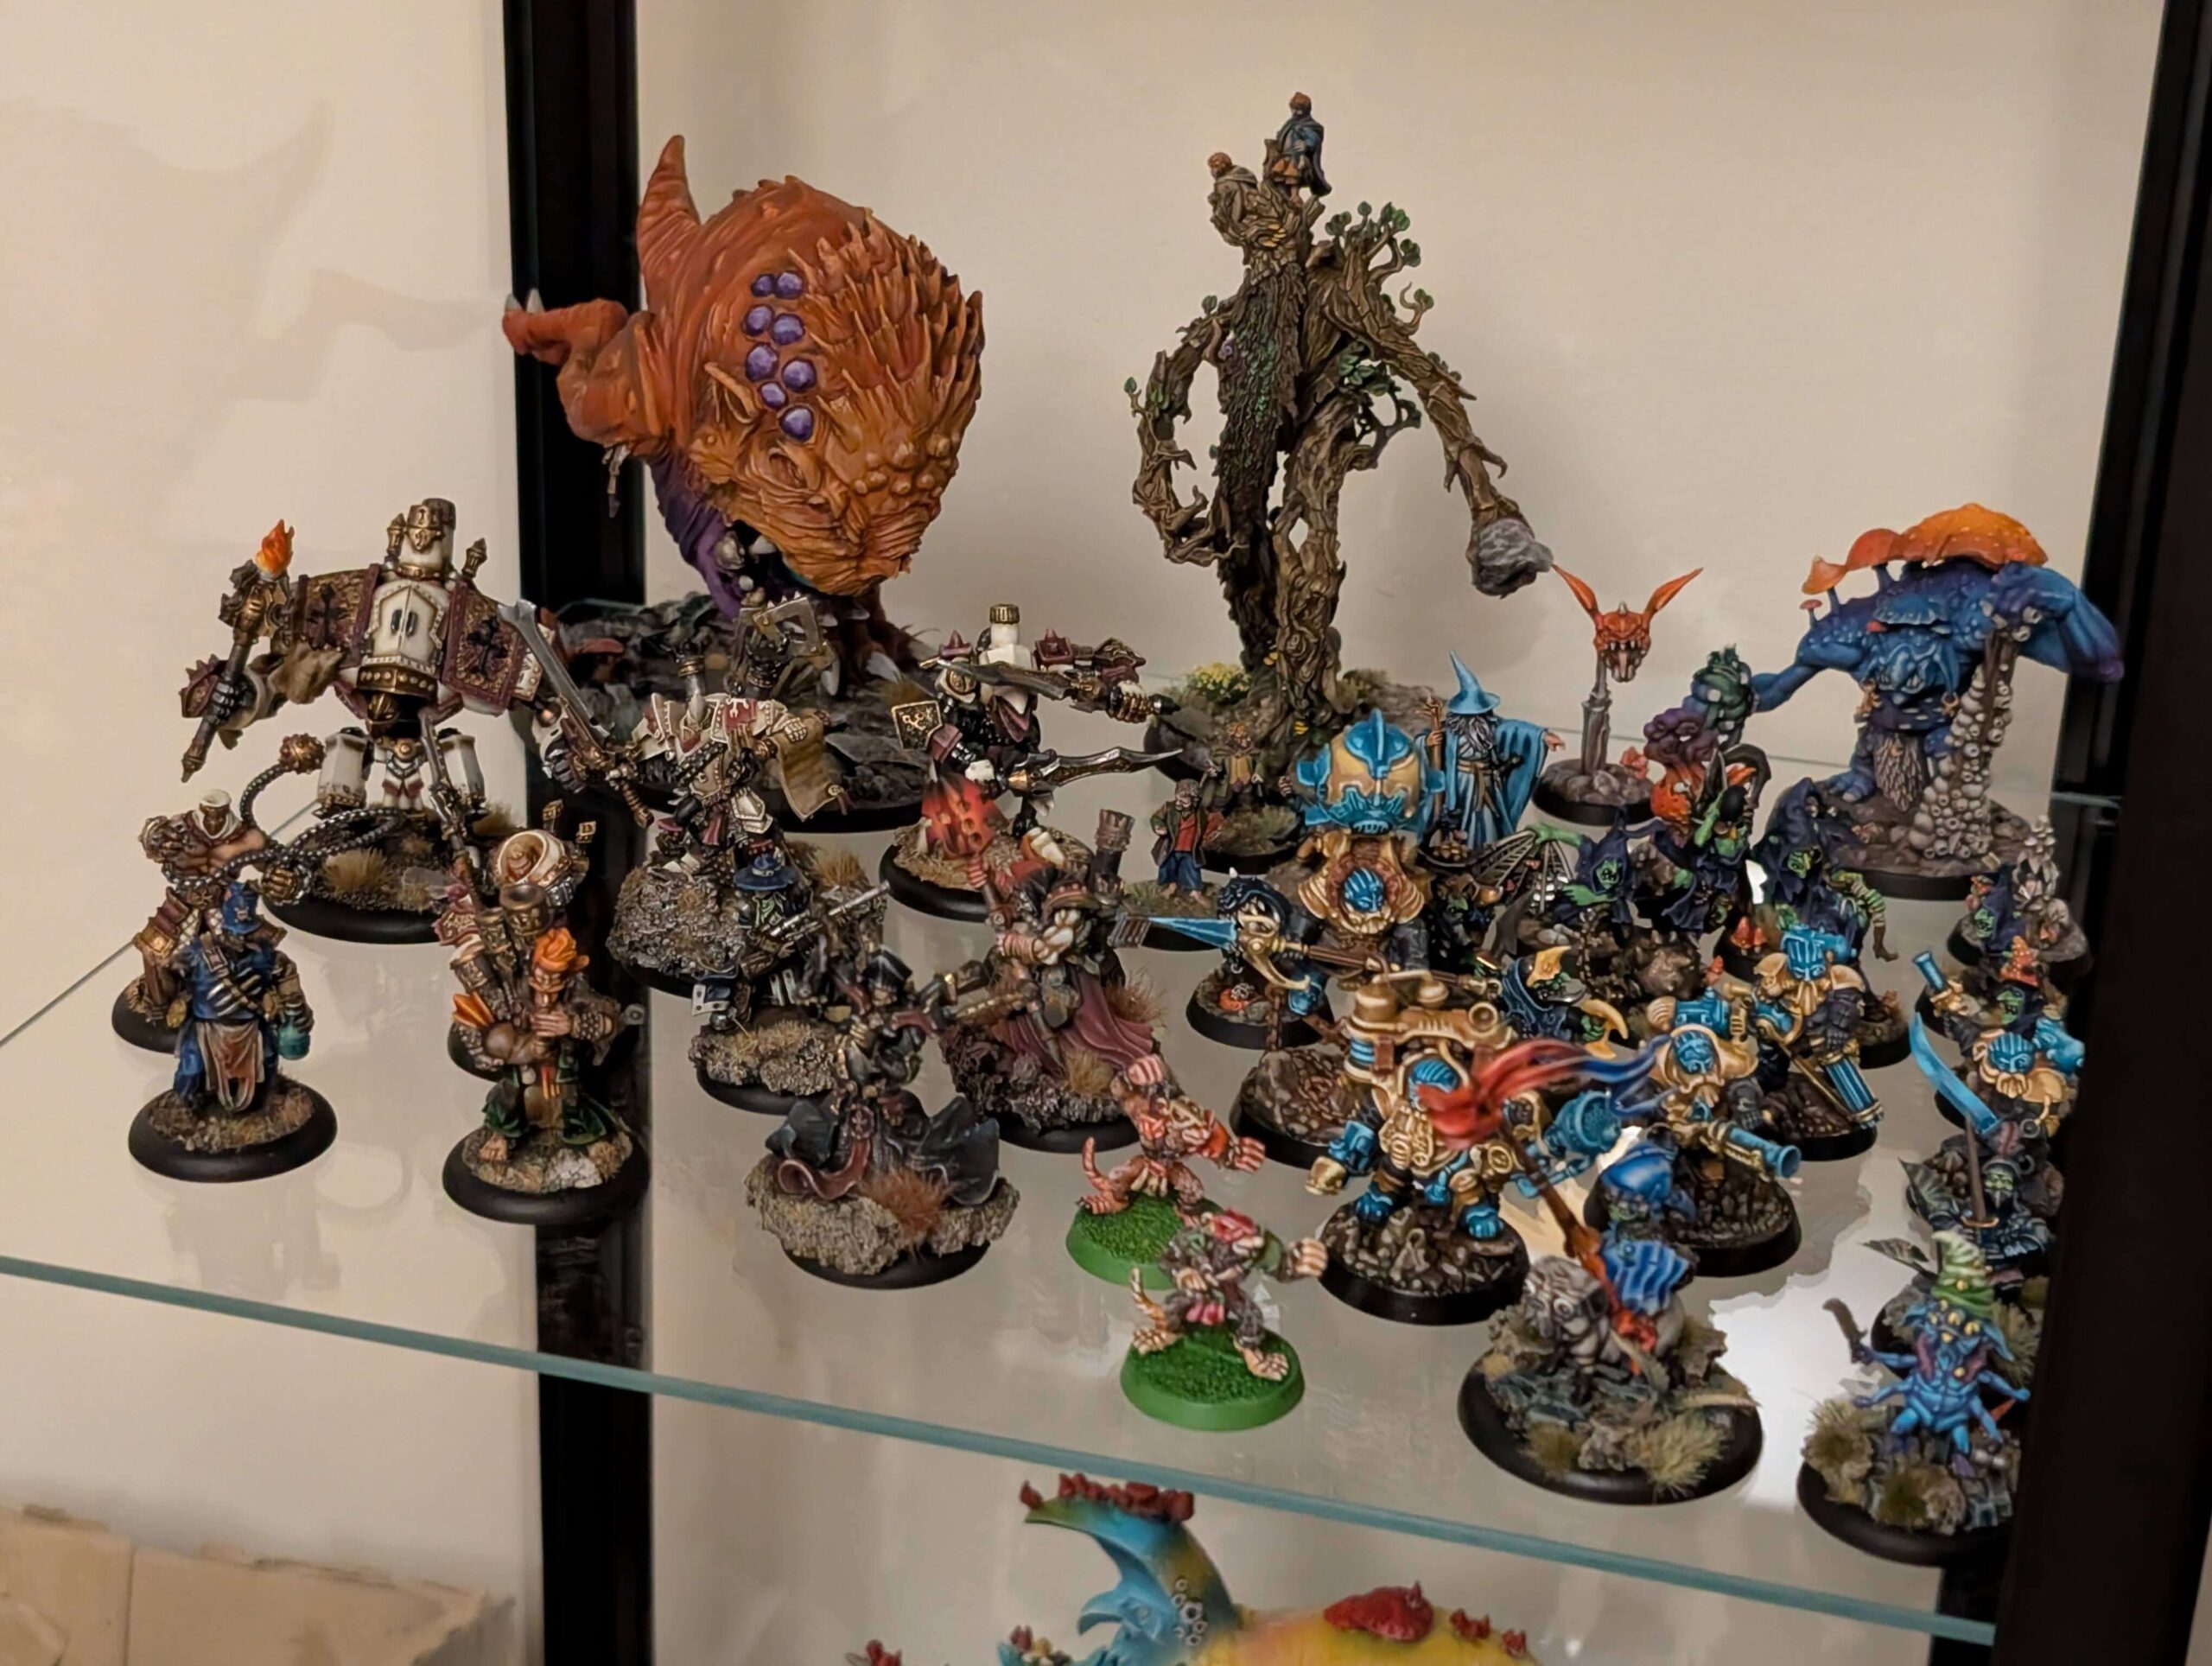
    Pro tip: If you have space, find somewhere to display your minis. It’s been a great way to celebrate my work. Each new finished miniature goes in the cabinet to be admired.

    Practice Mindfulness

    Sometimes I also paint miniatures in complete silence. No music, no podcasts, no nothing. It really helps to immerse myself into the process. I can focus on every single brush stroke. Listen to the clinking sound of my brush against the water pot. Smell the water of my wet palette.

    I also try to practice breathwork, taking deep breaths before a painting session. It slows down my heart beat and improves my sense of relaxation before starting. This helps slow down my brain and immerses me into painting quicker.

    Limit Social Media

    I also limit social media. This is a big one for me. I have spent hours checking others’ posts and videos wishing I was painting instead. And then I would just keep scrolling. The doom-scroll spiral is real. Keep your social media usage in check and take breaks when necessary. I’ve been out of Instagram for at least 6 months now and it’s been liberating. You may not want to go cold turkey – but even leaving the phone outside the room can help avoid both negative and positive distractions.

    Bonus: Boost your motivation

    And if I need a boost to hobby motivation, I set myself a very small goal. Set the smallest goal possible for yourself and celebrate the small wins! Paint just one thing. Clean your desk. And if you want to see how I hack my hobby motivation check out my Paint the Boot method.

    Mindfulness to combat Warhammer comparison – Conclusion

    A backlog of Warhammer miniatures that are not painted.

    The Miniature painting hobby, be it Warhammer or otherwise, is a personal journey that does not require comparison. Everyone is doing their own thing. It is important to keep that in mind when, inevitably, you find yourself comparing your skill to others. The hobby is not a race, and it is at its best without the pressure of comparison.

    My mission at Badgeroid is to merge the joy of Warhammer with Mindfulness to relieve stress and improve mental health. In my experience mindfulness has been a game changer. I’ve learned how to deal with the stress of comparing myself to others and get back to enjoying painting.

    I’m still learning as mindfulness is a journey that lasts a lifetime. But it is certainly better than few years ago. So if there is something you take away from this article, it should be this:

    • Enjoy the process.
    • Celebrate the small wins.

    Trying to apply these two principles, and you’ll have a great time. Thanks for reading.

  • Conquer your Warhammer backlog with SMART Goals

    Conquer your Warhammer backlog with SMART Goals

    If you apply SMART goals to your hobby, you can paint more Warhammer minis, achieve more … and therefore be happy 😛

    My goal as a hobbyist usually goes like this: “I want to paint more Warhammer”.

    The problem is that it’s generic and a big task which can feel overwhelming and unachievable – killing my motivation.

    What does ‘paint more miniatures’ mean? …that I want to paint more.

    Ok, but when will I have achieved this?…. I don’t know!

    Exactly.

    What are SMART goals?

    Unpainted Blood Bowl Skaven miniatures and Moonstone Miniatures
    You gotta start somewhere..

    SMART goals are generally used in a professional environment to set up tasks and achieve targets. The word “SMART” is an acronym, let’s break it down with an example.

    S: Specific

    A goal needs to be specific. What exactly do you want to achieve? No vague answers! If you want to paint more miniatures, try to specify what you would like to paint. Is it Warhammer? Maybe an indie wargame you wanted to try for a while? An example for me would be:

    Example: I want to paint my Gloomspite Gitz army.

    M: Measurable

    The goal needs to be measured. This way you’ll know when it is achieved. So how are you going to measure your progress? The number of miniatures you want to paint? How many games you want to play a month? Or even how much time you will spend painting a week.

    Example: I am going to paint two units of Stabbas to add to my Gloomspite Gitz army.

    A: Achievable

    Set a realistic goal that can be achieved. Painting a whole army from scratch is counter productive as its such a large task. The goal should be challenging but attainable.

    In our example 2 units of Stabbas might be too much, so let’s update it.

    Example: I am going to paint one unit of Stabbas to add to my Gloomspite Gitz army.

    R: Relevant

    Start by asking yourself why you are doing it. Why are you setting the goal?

    Maybe you need that unit painted for the next tournament. Or you have a game planned and you want to show off with a fully painted army. Maybe you want to practice a specific army list, or you simply want to have fun!

    Example: I am going to paint one unit of Stabbas to add to my Gloomspite Gitz army, because I have a specific list that I want to try out and I don’t want to play with any gray plastic.

    T: Time-bound

    The goal needs to be achieved by a certain time. Setting a deadline helps with keeping an eye on progress to make sure you finish on time. Having no deadlines, especially for a hobby, means that its easy to let it drift.

    When I signed up to a Warhammer tournament I had a hard deadline to get my army painted. I can tell you, that really put me into gear!

    Example: I am going to paint one unit of Stabbas in two weeks to add to my Gloomspite Gitz army, because I have a specific list that I want to try out and I don’t want to play with any gray plastic.

    Partially painted Blood Bowl Skaven miniatures and Moonstone miniatures
    Bit by bit the backlog is conquered

    SMART goals and the hobby

    With the definition of SMART goals out of the way, how can we apply them to Warhammer and miniature painting?

    Quantity-based goals

    I like to break down the goal by quantity. How many miniatures I will paint, how many games I’ll play. Basically anything that I can count! See above for an example quantity-based SMART goal.

    Time-based goals

    The first time I used SMART goal in the hobby, I actually used time. I didn’t have a tournament or game to prepare for, I simply wanted to spend more time painting.

    “I want to paint my Gloomspite Gitz army for at least 30 minutes two times a week.”

    This goal is specific, because the goal is to paint Gitz. It’s measurable, as it’s 30 minutes. It’s achievable, because half an hour is not a long time. It’s also relevant because it’s part of my army collection. And it’s time-bound because the goals has to be completed within the week.

    Conclusion – SMART goals and Warhammer hobby

    Two painted Skaven blood bowl miniatures and two painted moonstone miniatures
    And some great results too!

    SMART goals are a really powerful tool at your disposal and you should definitely give it a go. By applying them to your miniature painting hobby, you’ll have no problem smashing through your pile of plastic.

    Here’s a quick definition reference for SMART goals:

    • S – Specific
    • M – Measurable
    • A – Achievable
    • R – Relevant
    • T – Time-bound

    And there you have it. SMART goals in the hobby, go forth and paint all your Warhammer! Let me know how it goes!

  • ULTIMATE Beginner’s Guide to Airbrushing

    ULTIMATE Beginner’s Guide to Airbrushing

    Airbrushing can be daunting. It’s fiddly, you need the gear and you need to practice. But it can save time, effort and give great effect.

    Benefits of using an Airbrush

    The airbrush is a great tool for any miniature painter. It can really improve your mini painting game and get your army painted in no time!

    With an airbrush you can:

    • Prime your miniatures.
    • Fine-tune your zenithal highlights
    • Apply base coats quickly and smoothly?
    • Make colour transitions a breeze
    • Establish lights and shadows quickly
    • Create effects like Object Source Lighting (OSL)

    I started airbrushing so I could prime any time, irrespective of the weather. Winters in the UK are not exactly known for their sunshine, so it helps not to have to wait until spring before I can prime some miniatures.

    What you need

    When I started out, I thought I’d need 2 things only: an airbrush and a compressor.

    However, there’s more to it so here is the complete list of everything I use:

    • A Dual Action Gravity Airbrush (obviously!). At this point, any non-branded airbrush will do. You will upgrade to a mid-range one once you have a bit more practice. Just remember it has to be Dual Action and Gravity fed. This describes how the trigger operates. More on that later. The paint is fed through from the cup down to the needle by gravity.
    • A compressor. The AS 186 model is the standard for mini painting. Any non-branded compressor of that model should be fine. You can get one with or without the air tank. I personally chose one with an air tank so that the motor isn’t always on when I spray. Make sure it includes, or you buy, the pipe to connect it to the airbrush!
    • Airbrush cleaner to use at the end of each session.
    • Spray pot to spray away any excess paint when finishing up/swapping colours out.
    • Inexpensive brushes to mix paint, clean etc.
    • Airbrush flow improver and airbrush thinner
    • A squeeze bottle, similar to the ones you get for ketchup, or a tattoo artist bottle. Fill with water which you can squeeze into the cup to dilute paint and clean.
    • A mask with filters. This one is important in my opinion! It’s true that acrylic paint is non toxic but better not breathe it in. Especially if you start experimenting with things like Enamels – you definitely don’t want that in your lungs!
    • Gloves. I use Nitrile gloves, useful when working with things like Enamel paints, Isopropyl alcohol.
    • Airbrushing station. Not essential and I personally do not have one because I do not have the space. But if I had, I would! Instead, I keep the windows open.

    What if I want a better airbrush?

    Badger Patriot 105 dual action gravity airbrush

    Badger Patriot 105 for the win! I had mine for many years and it’s an absolute workhorse. It’s inexpensive compared to other brands and a beast. With a 0.5mm nozzle you can blast that primer no problem!

    The size of the nozzle makes it not ideal for detailed work, but you would use a fancier airbrush for such things. On the other hand, the bigger needle makes it harder to bend. Perfect for beginners!

    What paint should I use?

    The short answer is any! As long as the consistency is right, any paint goes.

    To start, I recommend using normal paint so you can learn how to thin it (keep reading for tips below!).

    Otherwise, you can use:

    • Contrast paints
    • Speed paints
    • Air colour paint
    • Inks
    • Enamel paints

    These are all great options which each have different uses/purposes so do experiment!

    I noticed that Speed Paints dry on the tip of my airbrush very quickly so be mindful of that!

    You can even use Varnishes and Enamel paints (pictured above). Vallejo Metal Color Airbrush Colours are great too!

    So how do I use an airbrush?

    There are 3 things to keep in mind. The compressor’s air pressure, how far you pull the trigger of the brush, and how thin your paints are.

    Compressor’s air pressure

    Generally, keep the pressure between 20 and 30 PSI. The thicker the paint, the higher the PSI. The correct pressure depends on how much control you need and how close to the miniature you want to spray.

    If you are using primer, crank it to 30 and blast the mini from further away to cover it quickly.

    If you need to be precise and/or only apply the paint on very small parts, then lower the pressure and bring the airbrush closer to the mini. It’ll give you more control.

    Airbrush trigger

    The airbrush that you’ll buy will be dual action. Firstly you can press the trigger to let air out, and release to stop spraying. However, when you only press the trigger, no paint will come out. That’s because there is a needle inside that doesn’t let the paint mix with the air.

    To release the needle (and therefore paint), the trigger needs to be pulled backwards while it’s pressed. The more you pull the trigger, the more paint comes out.

    Tip: Don’t pull the trigger all the way back otherwise you’ll have too much paint and will obscure the details of your miniatures.

    The sequence of motion is:

    1. Push trigger – air comes out
    2. Pull the trigger – paint out
    3. Push the trigger forward again – stop the paint
    4. Release the trigger – stop air

    The trick is to understand how much to pull, and that will require practice!

    An airbrush before the trigger is pushed
    Airbrush “at rest”.
    An airbrush when pushing the trigger
    Push the trigger of the airbrush.
    Pulling the trigger of an airbrush
    Then pull! Remember to be light handed with this so you won’t overspray.

    One more thing to keep in mind is to spray in short bursts. This way paint has time to dry and you can build layers of colours. One long burst will inundate the miniature. We don’t want that!

    Aim!

    It turns out that it is quite hard to aim with the airbrush! At the beginning I was spraying all the wrong parts. It was hard to make the paint land on the correct spot!

    I don’t have a magic bullet for this one I’m afraid. My only advice is to start with something that doesn’t require much precision, and build up from there.

    For instance, I started by priming a whole set of boardgame minis. Nothing fancy, just blast the whole thing. Then I started doing big model base coats, like my Colossal Squig. Then I tried undershading and then I did smaller and smaller details gradually.

    How to thin your paint

    Thinning paints is always a tricky one.

    For primer, I do not thin it at all. I simply up the PSI on the compressor.

    First of all, I thin my paints straight into the cup. Normal paint needs thinning, otherwise it won’t go anywhere. Personally I try to go for milk consistency. So a touch thicker than water. I can’t give you a ratio as that changes between colours and brands. Just practice and you’ll nail it in no time.

    Quick Cleaning

    This one is a bit of a faff but it’s necessary…

    Switching between colours is the main obstacle when using the airbrush, so I’ll illustrate how I do it. It is also the main cleaning you’ll do. Once you can do that quickly you’ll be able to use your airbrush no problem.

    1. Pour leftover paint away. Spray any excess in the spray pot.
    2. Fill airbrush cup with water.
    3. Back flush the airbrush. To do this, hold a thumb or a piece of paper at the front to block any paint coming out. Then trigger the airflow and pull. The air won’t have anywhere to escape so it will “back flush” into the cup and bubbles will show.
    4. Pour away the dirty water.
    5. Repeat three times.
    6. Use paper to wipe away excess in the cup.

    If you are at the end of the session, repeat the process once with airbrush cleaner.

    Maintenance

    Sometimes the airbrush will clog. If no paint is coming out, then you probably have a blockage.

    All the tools to clean an airbrush

    If that happens you’ll need to clean the tip. Generally, a regular maintenance routine will save you from any issues during a painting session!

    I have created a little diagram so you can follow the instructions below.

    A diagram showing all the parts of an airbrush

    Clean the nozzle

    Cleaning the nozzle is fairly straightforward. Unscrew the air cap and the nozzle should come out. I then dunk it in a cup with airbrush cleaner for a few hours to a day. Then I use a nozzle needle to clean up inside the nozzle and scrape any gunk that might have built up.

    Clean the needle

    For the needle you have to unscrew the needle chucking nut from the back. Then pull the needle carefully.

    You want to be very careful with this one! If the needle bends it’ll be unusable so you’ll have to buy a new one.

    Once the needle is out, dab some paper with airbrush cleaner and remove any build-up of paint. Slowly insert the needle back and push all the way. Screw the nut back in place and you’re done!

    Clean the body

    Sometimes it’s worth cleaning up the whole airbrush. All that you have to do is to take it apart fully and leave it overnight in a jar with airbrush cleaner.

    Then use a needle tool and needle brushes to clean up the inside. Scrape away any build up of paint and then reassemble. Done!

    Ultimate airbrush guide – Conclusions

    Airbrush compressor and airbrush kit

    This is all the knowledge I have about airbrushing. We’ve looked at many things:

    • All the benefits of airbrushing.
    • What tools you need.
    • How to use an airbrush.
    • What paints you need and how to thin them.
    • Cleaning and maintenance.

    Have I missed anything? If there is something I should add to this guide let me know in the comments! Would love to hear new tips and tricks!